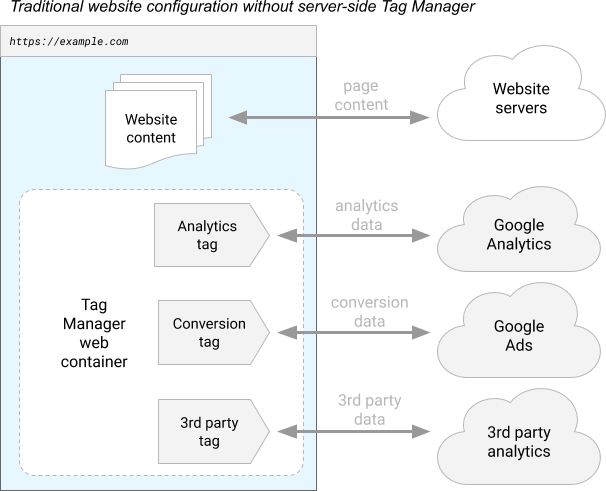
Google Tag Manager server-side is a completely new way of Web analytics tracking. The server container also uses the same traditional Tag, trigger, and variables structure that you are already used to While providing new tools to measure end-user activity whenever and wherever it happens.
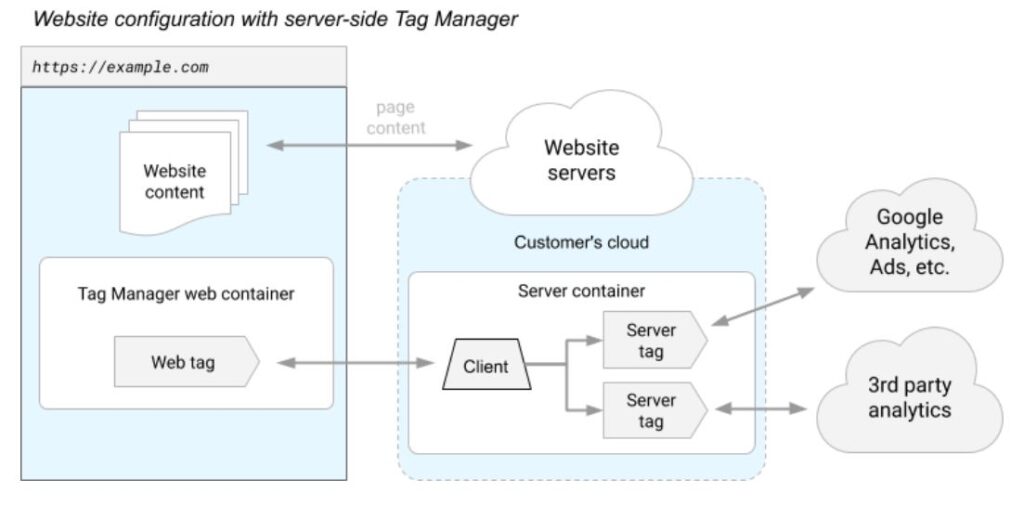
Table of Contents
- Why is GTM- Server Side Tag required?
- Create Server-Side Google Tag manager
- GTM Server Tags, Triggers, Variables, and clients in the server container
- Sending Data to GTM Server Container
- Testing GTM server
- Publish your both Containers
- Conclusion
Why is GTM- Server Side Tag required?

- You have full control of the data that should be tracked and passed to 3rd party libraries which you cant do in client-side tracking
- It’s like the managed area for all collected data that is passed from your website, app, offline data store, or any other connected systems in your Martech.
- It gives you unprecedented control over data validation, security, and privacy.
- It reduces client-side load stress, avoids cookie leaks & PII leaks, checks cross-site tracking, and integrates with other systems and APIs you control or are connected to.
- It will be going to reduce the impact of ad blockers in the browsers.
Create Server-Side Google Tag manager
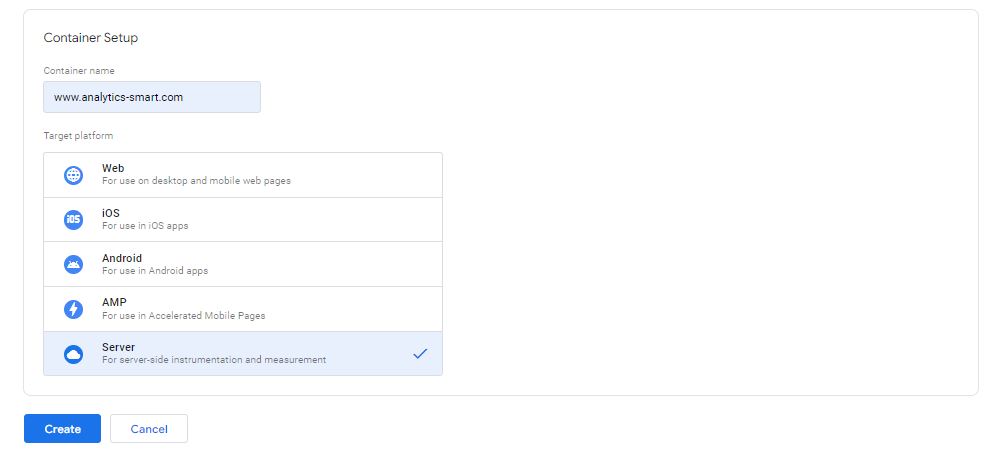
As you login to your Tag Manager account, in the admin tab click on the + icon and select server
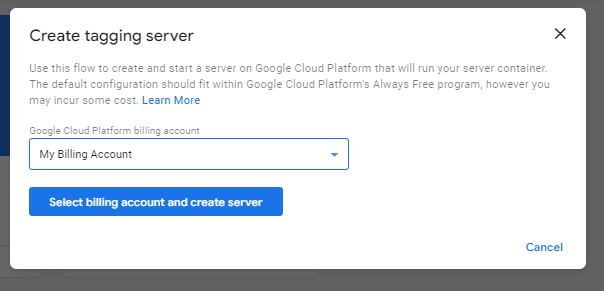
After that, you have to create a project in the Google Cloud Platform as you have to host a new server container somewhere. It is an easy step unless you want to choose another cloud-like AWS or azure. I would recommend using “Automatically provision tagging server “
If you are new to GCP, you will be asked to create a billing account and then you will be able to use it. You have to fill in your credit card details. Charges are nominal unless traffic or processing is huge.

As you create the billing account then you are asked to complete the steps. Select a billing account and create a server. The loading process might take some time.
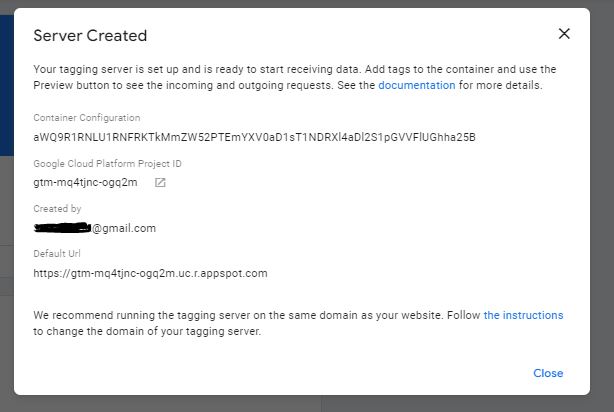
Once everything is done, you will see the information about the created sever with all details (GCP project ID, Default URL, managed by, etc.)
GTM Server Tags, Triggers, Variables, and clients in the server container
The method of the setup of tags, triggers, and variables is the same in server-side containers and there is an addon.
Client
The client is basically responsible for getting and processing/ adapting the data that is received by the GTM server-side container. After that, it makes the data available to tags, triggers, and variables of the container.
In a general tag management container, the data is generally available from some javascript code pushed to the dataLayer object. Now on GTM-Server Side, the data is directly sent to the server-side container from which your custom-defined client catches it, then makes it available to use in the Container.
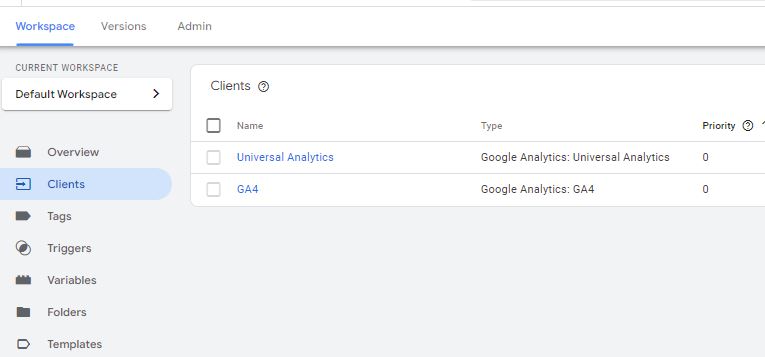
As soon as you create a new container, two clients are automatically created. One is Universal Analytics and another is GA4.
You can additionally create custom clients based on requirements like one for ga another for Fb and something else for other pixels.
Custom clients require good JavaScript Knowledge in addition to what all APIs are available in the client templates.
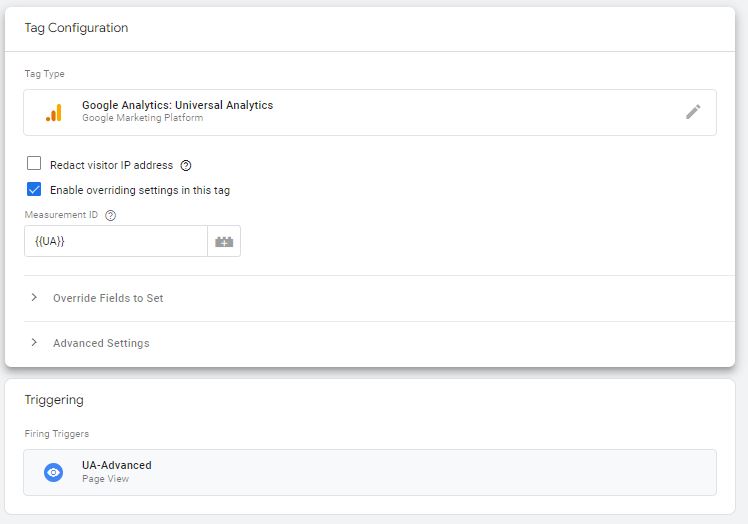
But for initial setup, you don’t need to code and create clients. We are going to use the Universal Analytics client which is available out of the box. It’s like every time UA data is sent to the SGTM container, this client will catch and make it available for your use.
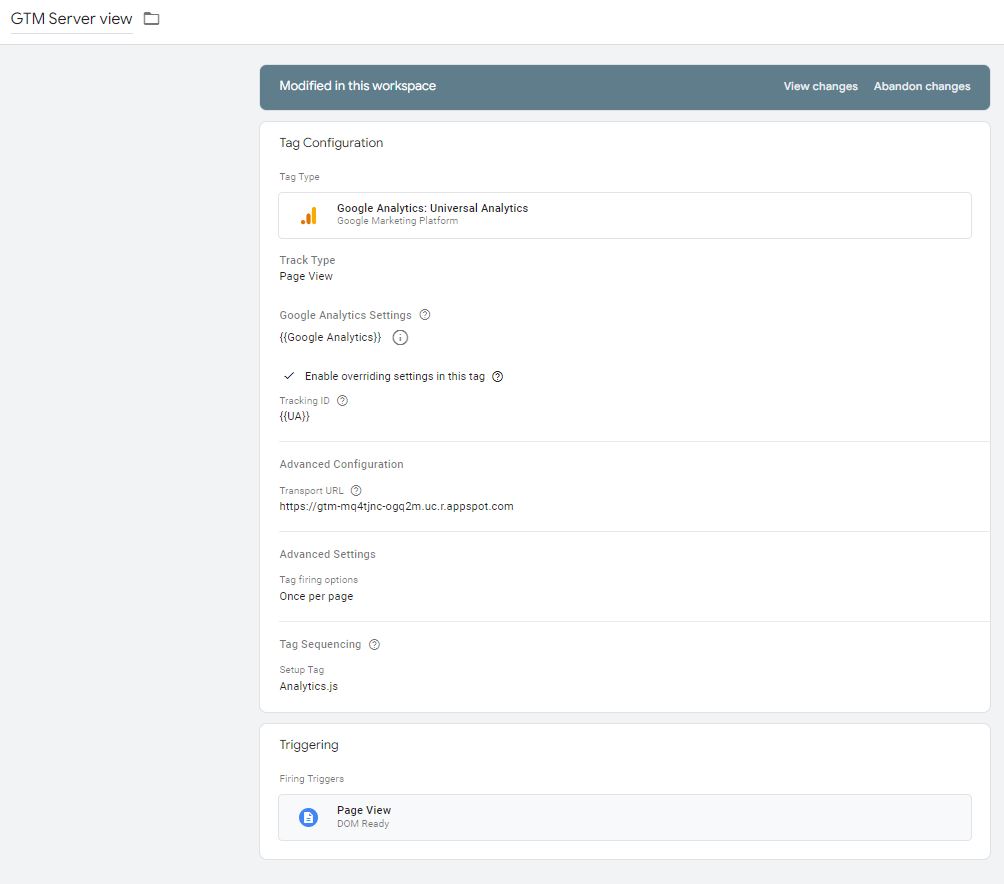
To make it happen you need to create a Google Analytics server tag that will send the data further to the Google Analytics server.
In a server-side container, UA Tag is enough to receive data for events, page views & purchases from your site and send it to GA servers.
I have overridden the tracking ID with my own UA tracking ID on which I want to send the data.
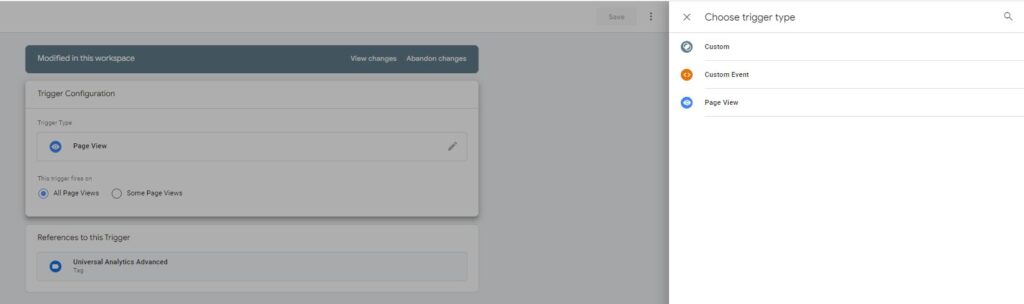
As of now, only 3 trigger types are available
Sending Data to GTM Server Container
There are many ways to do that here Google docs GTM-server sends data
I am using the google tag manager web container to send data to the GTM-server container. You just have to make a copy of your page view tag and provide the gtm-server URL in advanced settings ‘Transport URL’
Testing GTM server
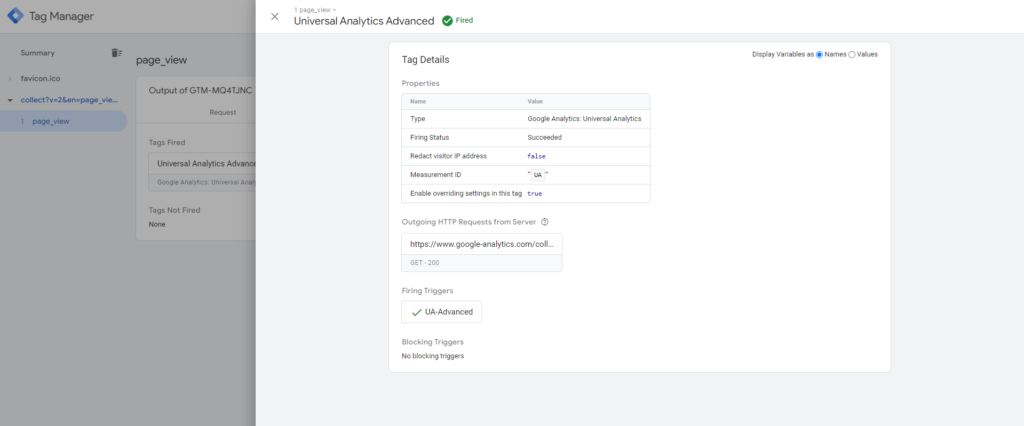
Again process is the same just preview your Tag manager sever. You should have a page view tag configured to fire on all pages.
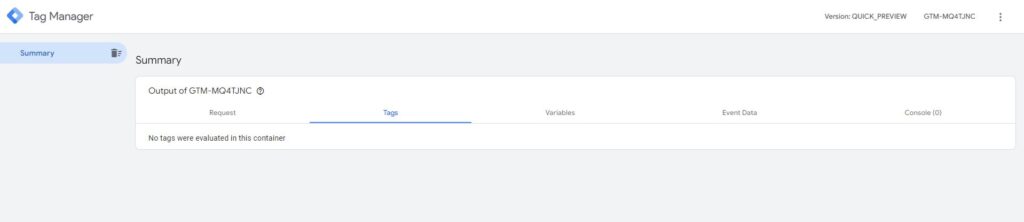
As you reload the page you can see the request received on the GTM-server container. It will be displayed on the left side in the preview mode
Publish your both Containers
- Ist Container is a regular one that is web-based. Here you have to create a copy of the Page view tag and provide the ‘Transport URL’ of your server container.
- 2nd is your GTM-Server container which will be handling your clients to receive data of analytics and then send it to your property or any other APIs you want it to send.
Conclusion
GTM server container is not a replacement for the current tracking solutions which you are utilizing now. Complete knowledge of dataLayer, javascript, jquery with Tag, Triggers, and Variable required for custom development of clients for different sources.
As privacy concerns and GDPR & CCPR rules are increasing whole industry is shifting towards Ist party data to lower the data leak issues within the Organizations, which will increase the use of server-side tracking.
Debugging will be more complex in the GTM-server container, You should have an understanding of all tracking parameters in analytics.js

Pingback: Google Analytics GA4 Server Side Tagging with Google Tag Manager - Analytics Smart
Pingback: GTM Server-side for Google Ads Conversion tracking (Adwords) - Analytics Smart