
Table of Contents
- 1. Set up a Google Tag Manager account
- 2a. Setting Up an Account
- 2b. Container Setup
- 3. Accept Google Tag Manager Terms and Service Agreement which is mandatory
- 4. Installing Google Tag Manager
- 5. Account Page
- 6. Create GTM Test Property in Google Analytics Account
- 7. Change the variable in GTM
- 8. Preview Container
- 9. Refresh your website to Debug Tags
- 10. Publish container
- 11. Using Real-Time Analytics for verifying
- 12. Compare Data of Both Properties
- 13. Change Tracking ID in GTM
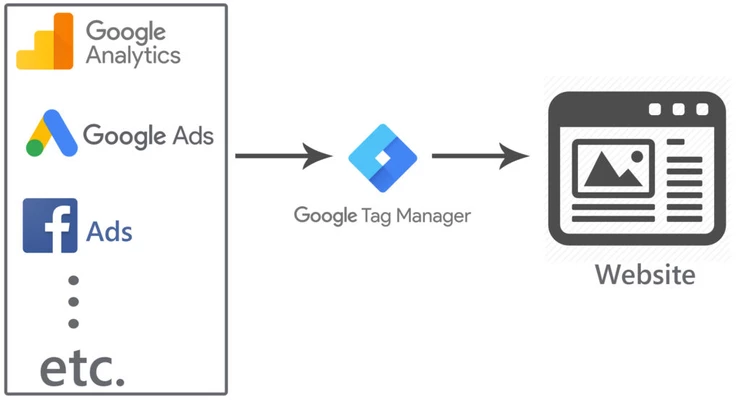
It helps users to easily add Google Analytics tracking codes (tags) to your website, deploy GA event code snippets and define rules, when each tag must fire. Google Tag Manager is the middleman of your digital analytics implementation on any website.
In this step-by-step tutorial, I will explain in detail how to set up Google Tag Manager account basics. I will share minute details of the basic configuration.
I will share the code in the end which you can easily import into your GTM account.
Here’s the process of how to install Google Analytics 4 with Google Tag Manager:
- Create a new GA4 property
- Create a data stream (I am discussing web-only in this post )
- Copy the Measurement ID
- Create a Google Analytics 4 Configuration tag
- Paste the Measurement ID and set the tag to fire on All Pages
- Preview/test the new tag
- Publish the changes in Google Tag Manager
1. Set up a Google Tag Manager account
You can use your Google account login for setting up your Google Tag Manager account. Basically your Gmail account id.
Login to your Google Analytics accounts and navigate to this URL.
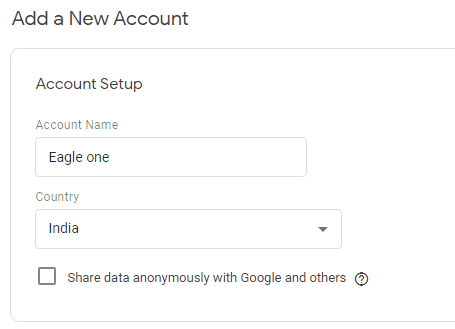
2a. Setting Up an Account
Fill in your account name and it’s your choice whether you like to share data anonymously with Google or not.
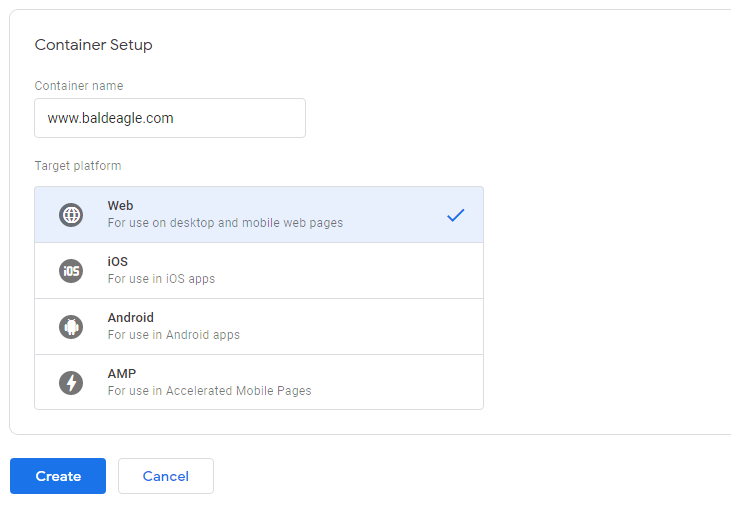
2b. Container Setup
Fill in your Container name and select web (if you own a website like me). You can change the name settings later if you make a mistake here.
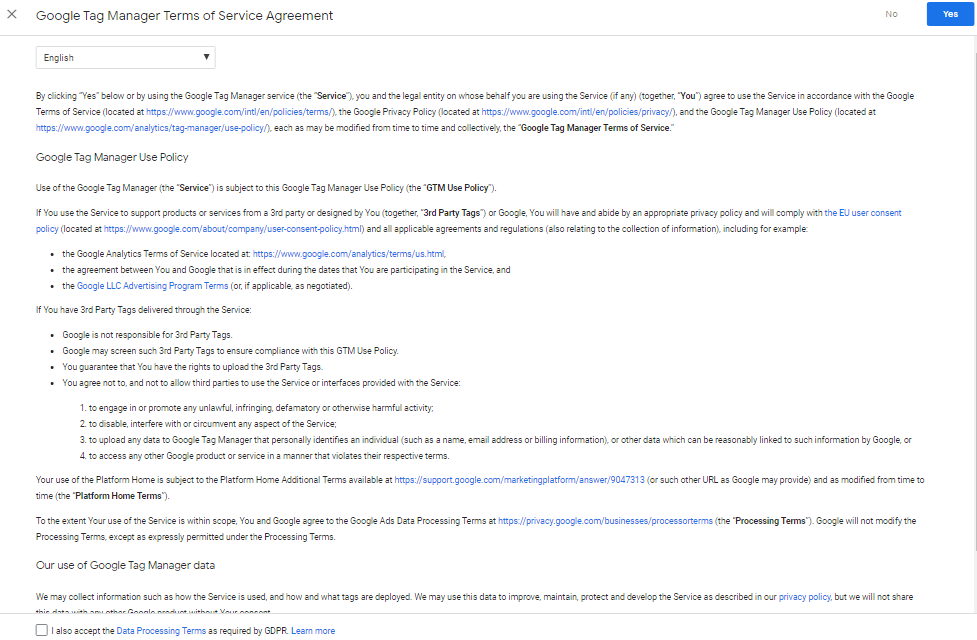
3. Accept Google Tag Manager Terms and Service Agreement which is mandatory
4. Installing Google Tag Manager
Read quick start guide provided by Google. If you have any problems with installing the code.
5. Account Page
After configuring the initial setup and hit “OK” on the code you will land on the below page.
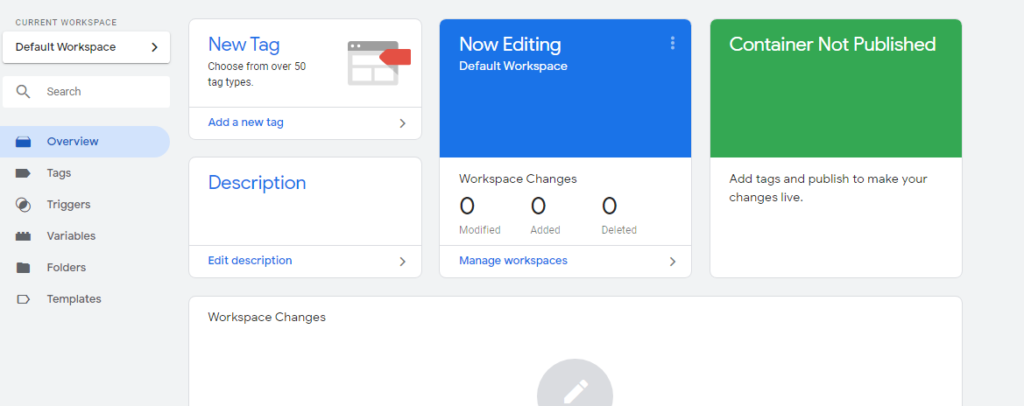
You just have created one account with one empty container. In order to get things working, you need to manually set up tags, triggers, and variables, or…
6. Create GTM Test Property in Google Analytics Account
It is highly recommended to set up a temporary new property in Google Analytics first instead of simply removing your current Google Analytics script.
After doing this you can:
- Test whether your GTM setup works correctly
- Compare the data of the two properties
7. Change the variable in GTM
This specific variable in GTM that you need to change to get this to work. It’s a user-defined variable.
You can find it in the variables list, named: YOUR_GA_TRACKING_ID.
Change “UA-XXXXXX-YY” into the tracking id of your newly created property of GA 4
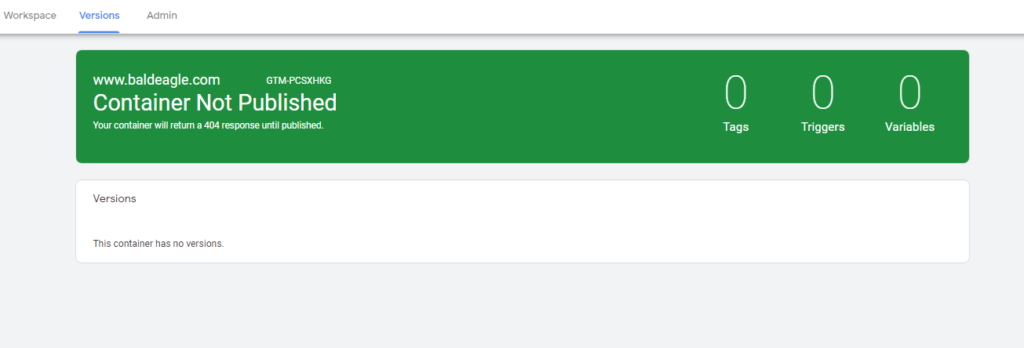
8. Preview Container
In the “Versions” section click on “Preview” the latest version (probably version 1). Container not published means no changes in the GTM have been published for site
9. Refresh your website to Debug Tags
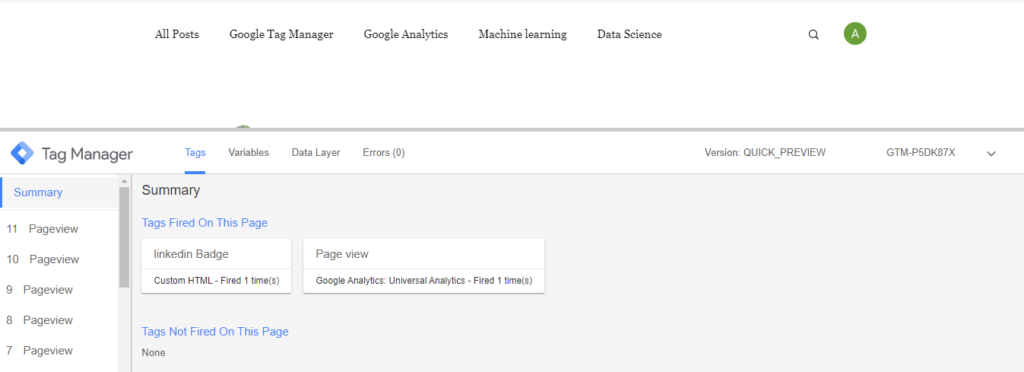
There is only a single page view and LinkedIn Tag on these pages
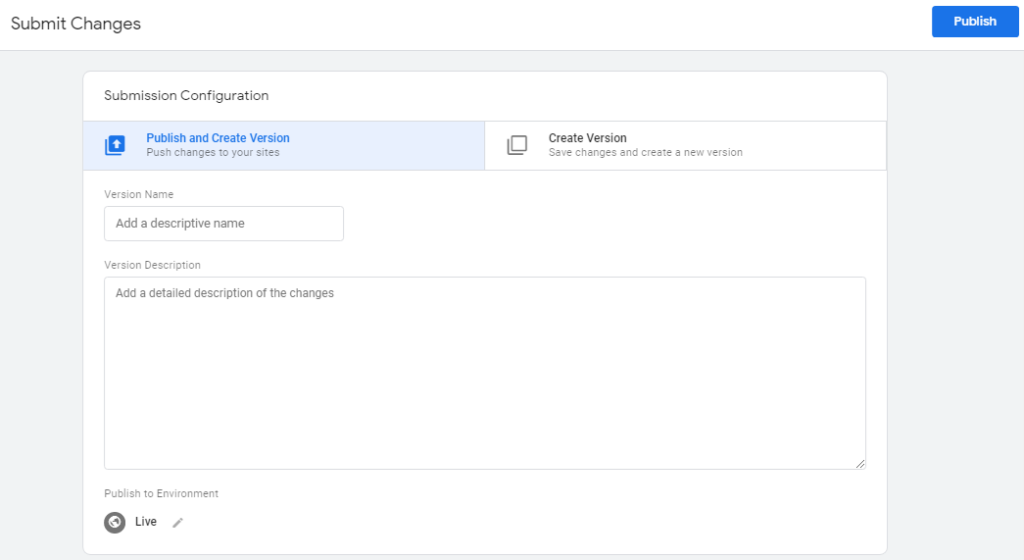
10. Publish container
In publishing a container you can add comments and descriptions so that you know what changes have been updated.
11. Using Real-Time Analytics for verifying
This is real-time data on page view on the website
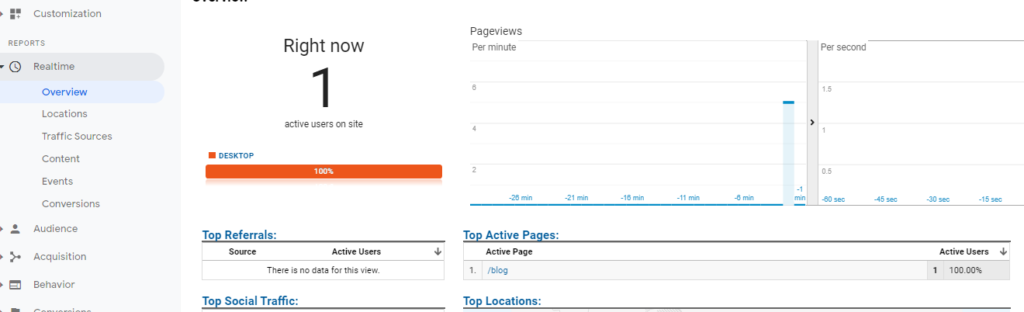
Note: make sure not to exclude your IP address in the GTM test property/view if you want to verify your data with real-time reports in Google Analytics.
12. Compare Data of Both Properties
From now on you have your “old” property (UA-XXXXXXXX-1) collecting data and your fresh, new GTM property (UA-XXXXXXXX-2) collecting data as well.
I recommend waiting for a couple of days to see your data coming in properly.
The numbers might deviate a bit from old tracking, but very that’s normal!
13. Change Tracking ID in GTM
After doing everything above and you are satisfied.
There are couple of last things to finalise
- Change UA number “-2” to “-1” in Google Tag Manager (please see step 7).
- Remove your current hardcoded script(s).

Refer: https://youtu.be/qNTMYNR1lE0
Pingback: Simple Ecommerce Analytics tracking with GTM - Analytics Smart
Pingback: Event-Driven Data Layer Guide for the First party tracking - Analytics Smart